
Title Block: What It Is, What Goes in It, and Free Templates (DXF, PDF)

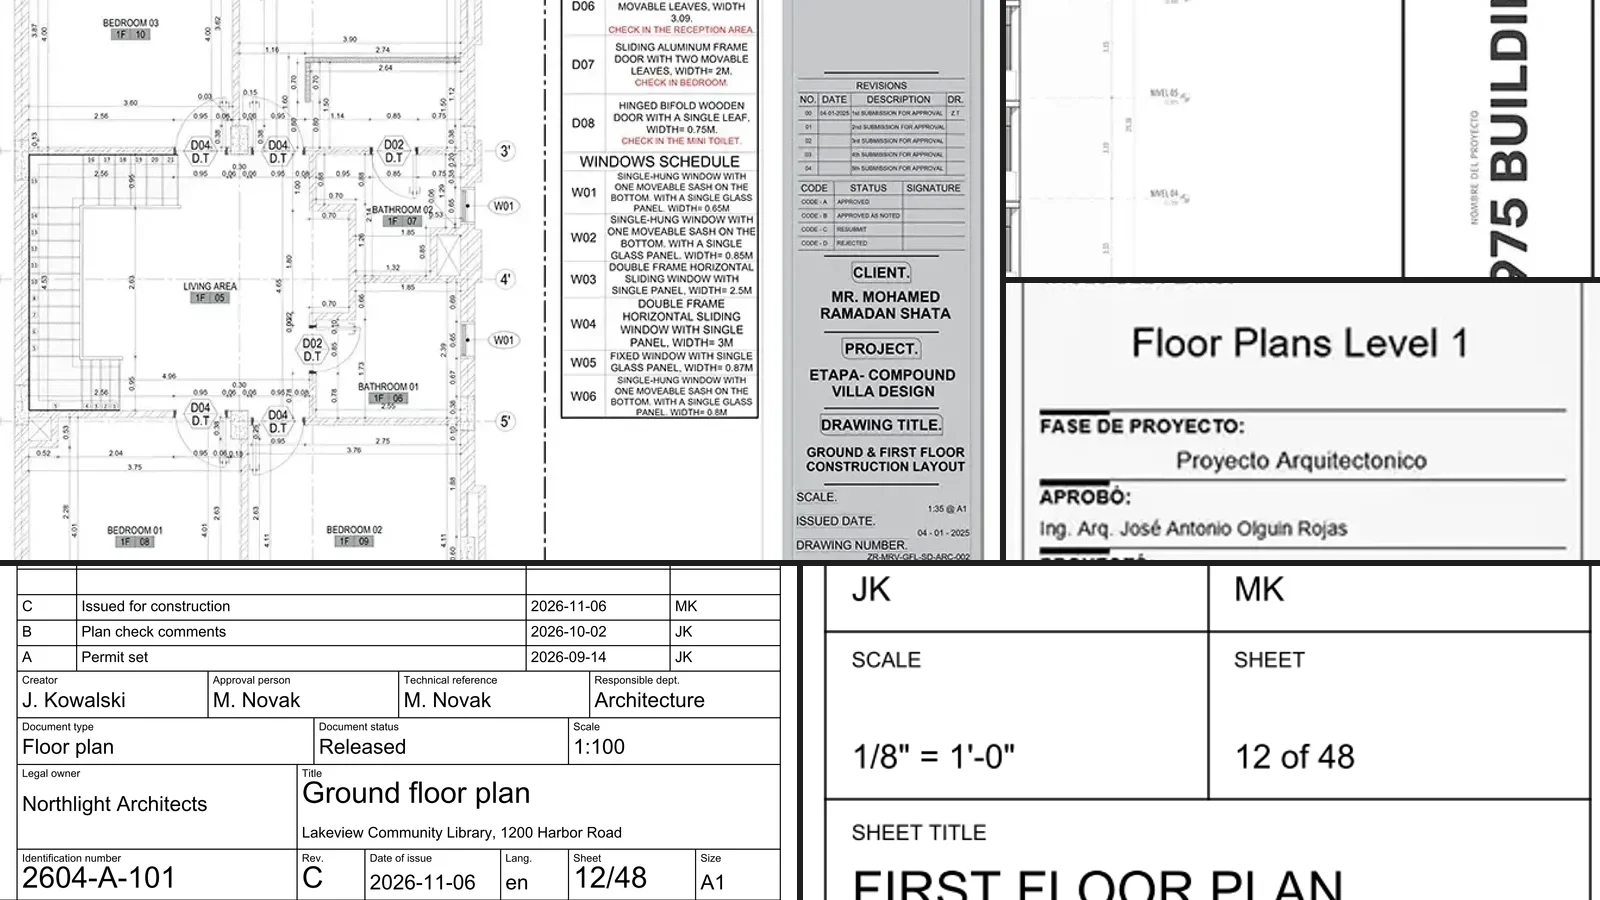
A title block is the labelled box on every drawing sheet that says what the drawing is: the firm that made it, the project, the sheet title and number, the scale, the date, the revision, and who drew, checked and approved it. It sits in the same place on every sheet of a set, bottom right on ISO sheets and down the right edge on most US architectural sheets, so anyone holding the drawing can tell in a few seconds whether it is the right sheet and the current revision.
Our articles are still written by humans!
Get human written articles in your Google feed.
This guide covers the fields a title block needs, where it goes on US and ISO sheets, real examples from architects' sets, and how to add one in AutoCAD and Revit. It also has five free title block templates we drew for this article, as DXF for CAD and PDF for printing, free to use and change.
The short version
- It identifies the sheet: owner, project, title, sheet number, scale, date, revision, drawn/checked/approved. The full checklist.
- Position: bottom right on ISO sheets (ISO 5457), a vertical strip on the right on most US sheets. US vs ISO.
- ISO 7200 makes eight fields mandatory and fixes the width at 180 mm. The ISO rules.
- Free templates: ARCH D, E1 and B, ISO A1 and A3, DXF and PDF, public domain. Download.
- AutoCAD and Revit: insert it in a layout, or build it as a family. Steps.
What is a title block?
Title block (definition): the area of a technical drawing sheet, usually framed and divided into labelled fields, that identifies the drawing and controls it: who owns and produced it, which document and sheet it is, what it shows, when it was issued, which revision it is and who approved it.
The drawing area shows the building. The title block is about the drawing itself. It answers the questions people ask before they read a single line: Is this my project? Which sheet is this? Is it the latest revision? May I build from it? That is why it looks the same on every sheet of a set and why its fields are filled in so carefully: a wrong date or revision letter in the title block is how an old drawing ends up on site.
In a full drawing set the title block also ties the set together. The sheet number in the title block (A-101, say) is what every section marker, elevation marker and detail callout on other sheets points to. Our guide to architectural drawings explains how those numbers are organised.
What goes in a title block: the checklist
These are the fields you will find on almost every architectural title block, with what each one holds:
| Field | What it holds | Example |
|---|---|---|
| Firm / legal owner | Who produced and owns the drawing, often with a logo | Northlight Architects, address, phone |
| Project name and address | The building the set is for | Lakeview Community Library, 1200 Harbor Road |
| Client / owner | Who the project is for | Anytown Public Library |
| Consultants | Engineers and other designers on the project | Structural, MEP, civil, landscape |
| Sheet title | What this sheet shows | First floor plan |
| Sheet number | The sheet's unique code in the set | A-101 |
| Project number | The office's job number | 2604 |
| Scale | The scale of the drawings, or AS NOTED | 1/8" = 1'-0", 1:100 |
| Date of issue | When this version was released | 2026-11-06 |
| Revisions | Number, date and description of each change | 3, 2026-11-06, Issued for construction |
| Issue status | What the sheet may be used for | Issued for permit, issued for construction |
| Drawn / checked / approved | Who made, checked and signed off the sheet | Initials, or full names on ISO sheets |
| Seal and signature | The licensed architect's or engineer's stamp | Required for permit sets in most US states |
| Key plan | A small plan showing which part of the building the sheet covers | Shaded wing on a mini plan |
| Sheet n of N | Position in the set (optional) | 12 of 48 |
Three of these deserve more care than they usually get:
- The revision table is the history of the sheet. Each time the sheet is reissued, add a row: number or letter, date, a description of what changed. Changed areas are clouded in the drawing and tagged with the same number. ISO 7200 suggests revision letters A to Z, then AA, AB, and avoiding I and O, which are easily confused with 1 and 0.
- The issue status says what the sheet may be used for. "Issued for review", "issued for permit" and "issued for construction" mean very different things to a contractor. Our article on IFC drawings (issued for construction) explains the status ladder.
- Dates should be unambiguous. 04/05/2026 is April in the US and May in Europe. Writing dates as 2026-05-04 (ISO 8601) avoids the question on international projects.
Where the title block goes: US sheets vs ISO sheets
There are two common layouts.
ISO sheets (Europe and most of the world) put the title block in the bottom right corner of the drawing area. ISO 5457 requires that position for A0 to A3 sheets, which are used landscape, so the title block stays visible when the sheet is folded down to A4. A4 sheets are used portrait, with the title block along the bottom.
US architectural sheets usually put the title block in a vertical strip down the right edge, running the full height of the border. The firm sits at the top, the project and revision history in the middle, and the sheet title and a large sheet number at the bottom right. Some US offices and most engineering drawings use a block across the bottom right instead. Both layouts put the sheet number in the bottom right corner, which is where people look when they flip through a set.
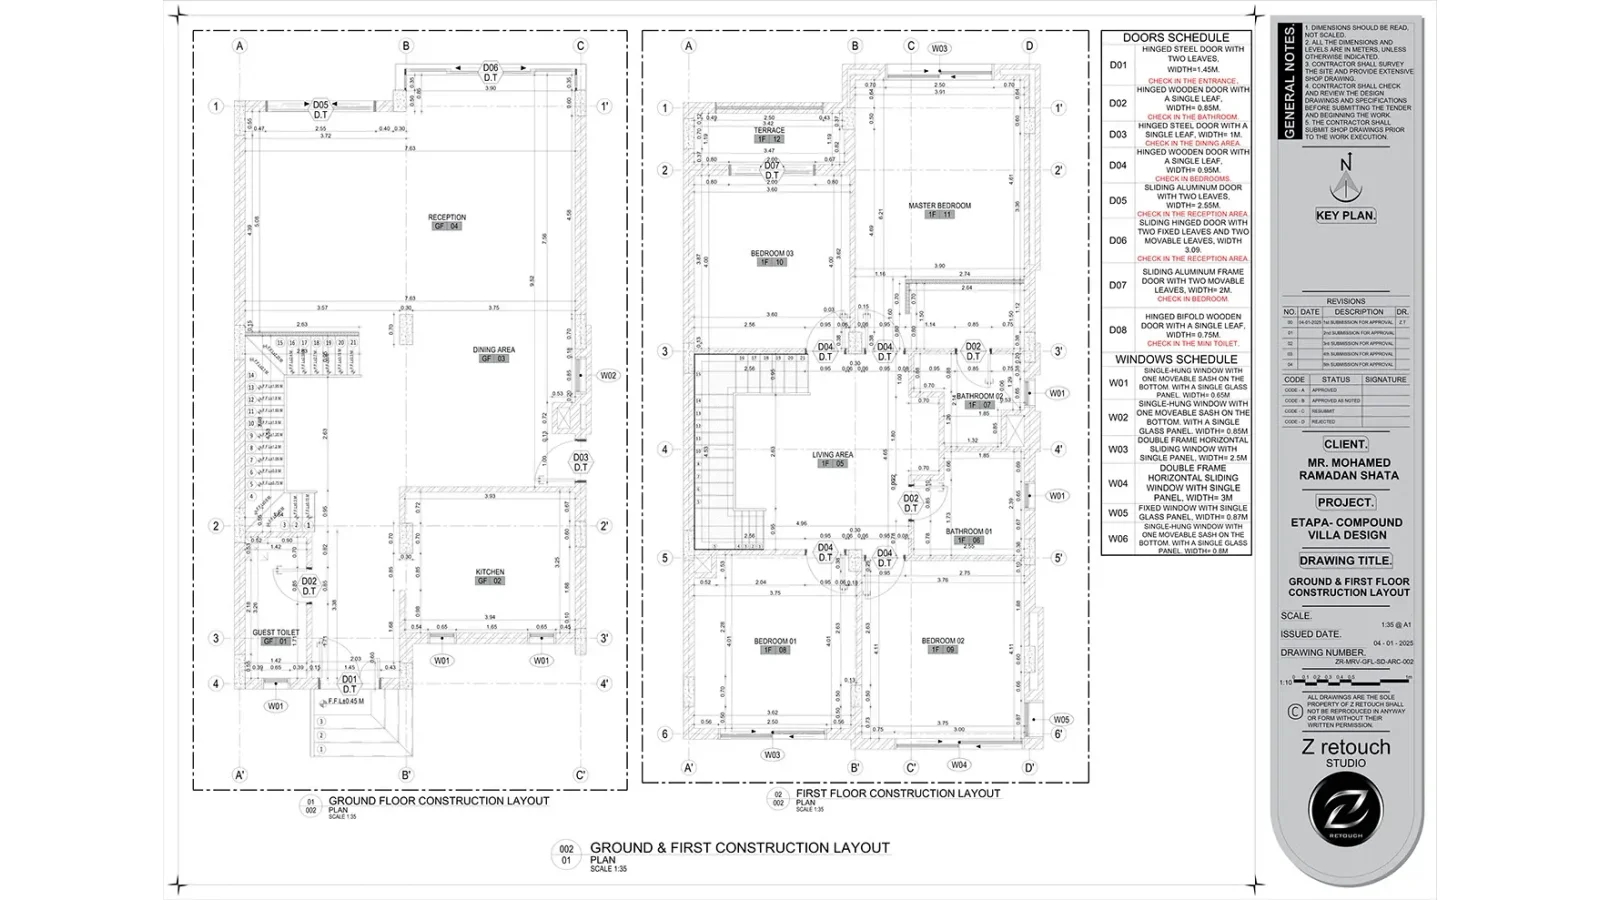
A vertical title block on a construction sheet: general notes at the top, then the revision table with approval codes (A approved, B approved as noted, C resubmit, D rejected), the client, the project, the drawing title, scale, issue date and drawing number, and the studio's mark at the bottom. Reference: ETAPA Shop Drawing Package by Ziad Tarek (Z retouch studio) on Behance.
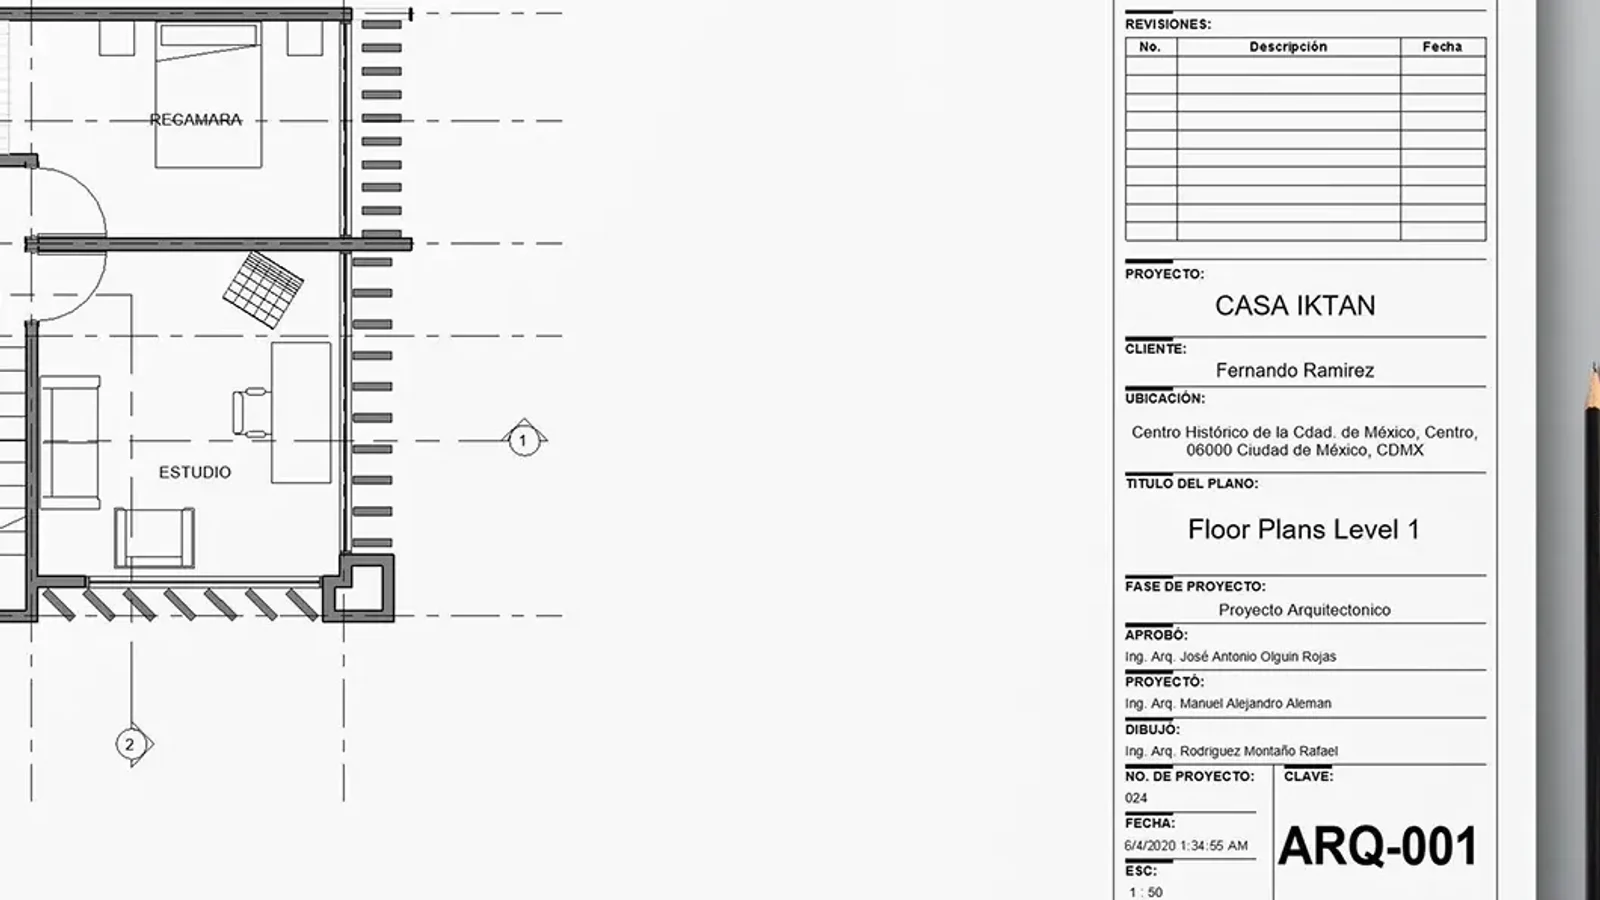
A title block in the bottom right corner, built as a Revit family: revisions on top, then project, client, location, drawing title, phase, the three people responsible, and the project number, date, scale and sheet code ARQ-001. Reference: Revit Title Blocks by Antonio Olguin Rojas on Behance.
A title block can also be the identity of the set. This one turns the project name into a large rotated headline running up the strip:
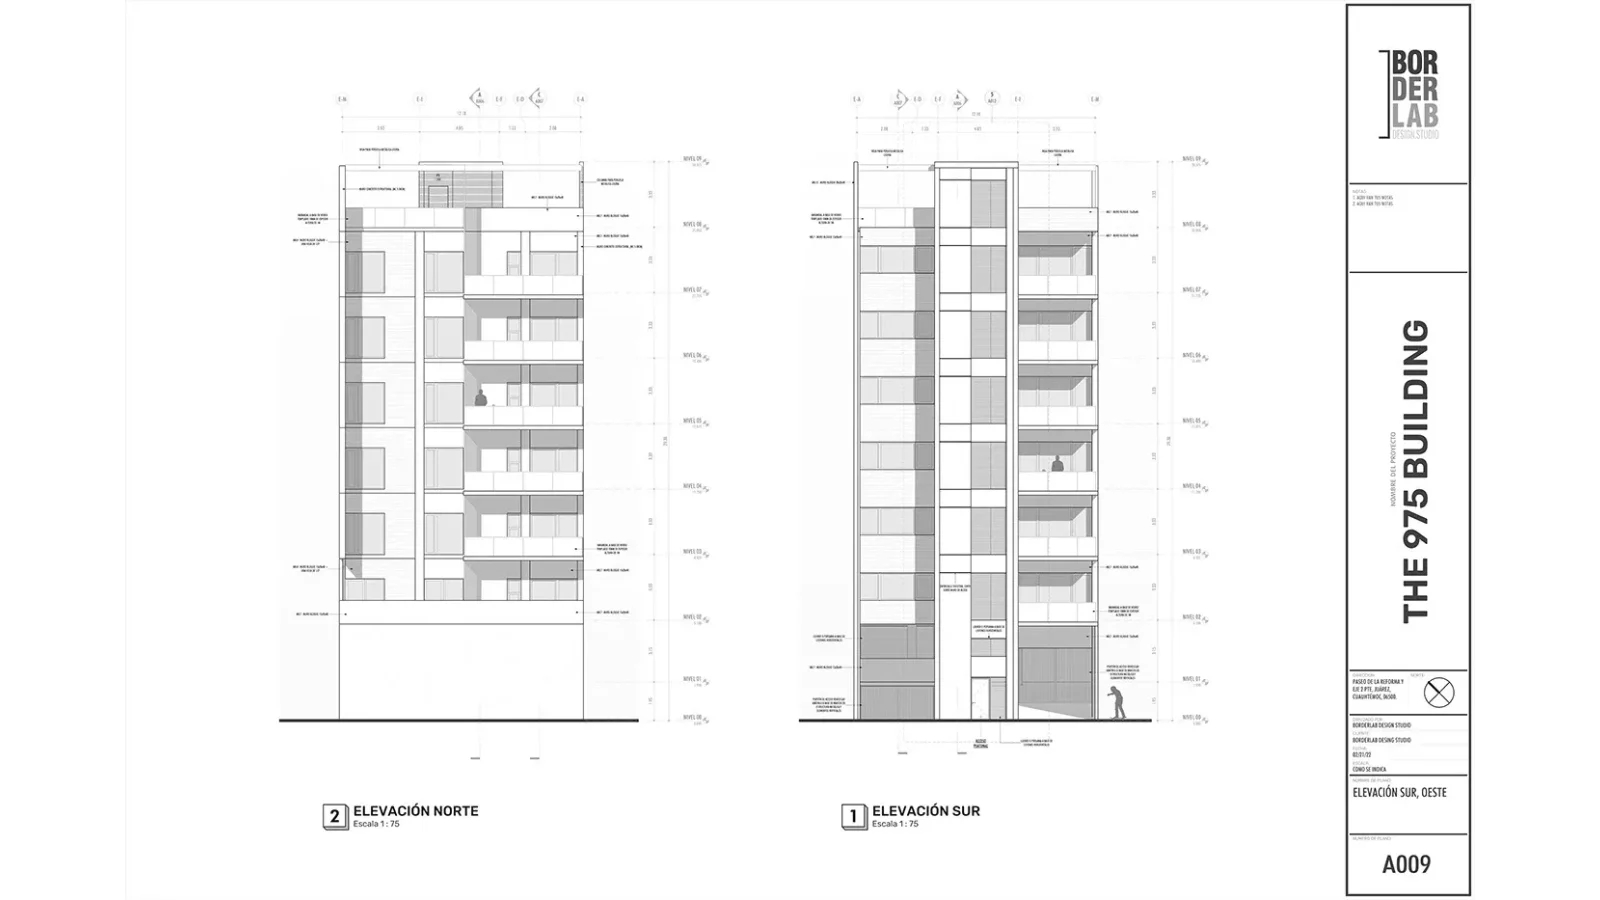
A minimal vertical strip: logo, notes, the rotated project name, then address, designer, client, date, scale, sheet name and the sheet number A009 at the bottom. Reference: Revit Pie de Plano (Title Block) by the drafter box on Behance.
The ISO rules: ISO 7200 and ISO 5457
Two international standards govern title blocks:
- ISO 5457 sets the sheet sizes and layout: the A-series sizes from ISO 216, the border, the centring marks and the title block position in the bottom right corner.
- ISO 7200 (second edition 2004, confirmed in 2025) defines the data fields in a title block, their names and recommended length. Its rule of thumb is to keep the title block to a minimum and to show other data only when it is used.
ISO 7200 marks eight fields as mandatory:
| Group | Mandatory fields | Optional fields |
|---|---|---|
| Identifying | Legal owner, identification number, date of issue, segment/sheet number | Revision index, number of sheets, language code |
| Descriptive | Title | Supplementary title |
| Administrative | Approval person, creator, document type | Responsible department, technical reference, classification, document status, page number, number of pages, paper size |
It also fixes the size: the title block is 180 mm wide on every sheet size, so the same block fits an A4 sheet with a 20 mm left margin (for filing) and a 10 mm right margin. Scale, projection symbol and general tolerances are not title block fields in ISO 7200; they go outside the block when the drawing needs them. Our ISO template follows these rules and adds a scale field and a revision table above the block, which architects expect.
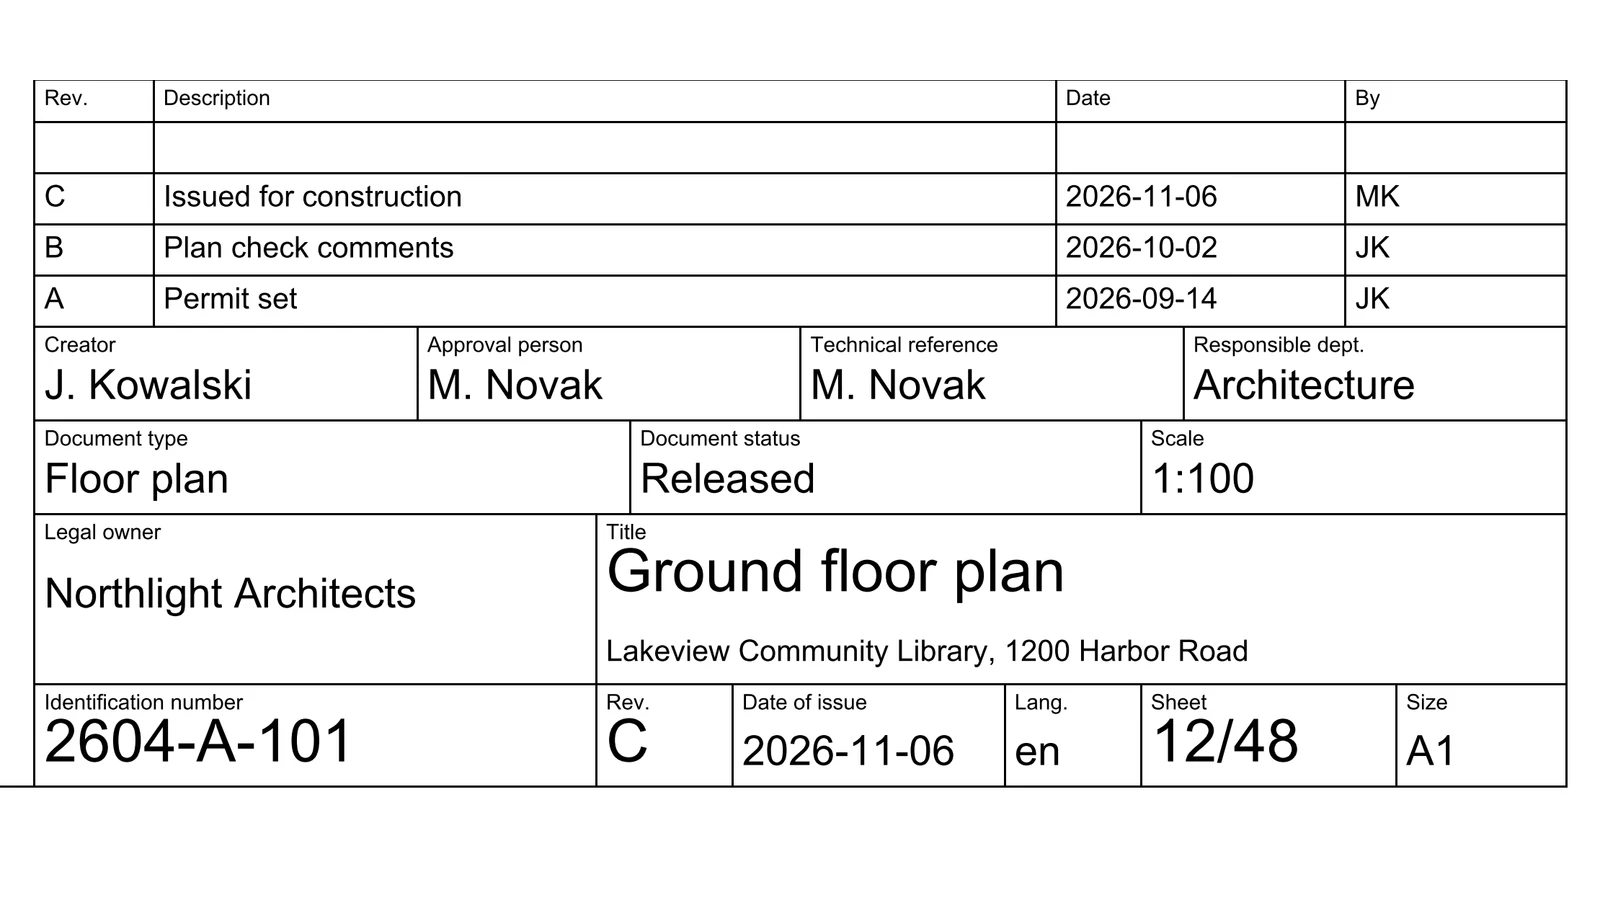
The ISO 7200 title block from our free A1 and A3 templates, 180 mm wide, filled with made-up example values. All eight mandatory fields are there; the bottom row carries the identifying fields.
Drawing sheet sizes
The title block is drawn for a sheet size, so pick the size first. US architects mostly use the ARCH series; engineers and manufacturers use ANSI; the rest of the world uses ISO A sizes.
| Series | Size | Inches | Millimetres | Typical use |
|---|---|---|---|---|
| ARCH | B | 12 × 18 | 305 × 457 | Half-size prints of ARCH D |
| ARCH | C | 18 × 24 | 457 × 610 | Small projects, presentations |
| ARCH | D | 24 × 36 | 610 × 914 | The standard US architectural sheet |
| ARCH | E1 | 30 × 42 | 762 × 1067 | Large projects |
| ARCH | E | 36 × 48 | 914 × 1219 | Very large plans |
| ANSI | B | 11 × 17 | 279 × 432 | Tabloid, half-size of ANSI D |
| ANSI | D | 22 × 34 | 559 × 864 | US engineering drawings |
| ISO | A3 | 11.7 × 16.5 | 297 × 420 | Small sets, reductions |
| ISO | A1 | 23.4 × 33.1 | 594 × 841 | The standard ISO architectural sheet |
| ISO | A0 | 33.1 × 46.8 | 841 × 1189 | Large plans |
Free title block templates (DXF and PDF)
We drew five title block templates for this article. They are free and in the public domain (CC0): use them for commercial work, change them, add your logo, no credit needed.
| Template | Sheet | Layout | Downloads |
|---|---|---|---|
| ARCH D | 36 × 24 in | US vertical strip, 3.5 in wide | DXF · PDF |
| ARCH E1 | 42 × 30 in | US vertical strip, 4 in wide | DXF · PDF |
| ARCH B | 18 × 12 in | The ARCH D sheet at exactly half size | DXF · PDF |
| ISO A1 | 841 × 594 mm | ISO 7200 block, 180 mm, bottom right | DXF · PDF |
| ISO A3 | 420 × 297 mm | ISO 7200 block, 180 mm, bottom right | DXF · PDF |
What is in each file:
- Every value you fill in is an attribute. When you insert the file into a drawing, your CAD program asks for the firm, project, sheet title, sheet number, dates, revisions and the rest: 39 fields on the US sheets, 32 on the ISO sheets. Labels, lines and the border are ordinary geometry.
- Drawn at 1:1 paper size in model space: inches for the ARCH sheets, millimetres for the ISO sheets, with the border on the sheet's margins and the origin at the sheet's bottom left corner.
- DXF version 2013, which AutoCAD, AutoCAD LT, BricsCAD, DraftSight, LibreCAD and most other CAD programs open. The text uses Arial. We generated the files with the open-source ezdxf library and checked them with two independent DXF parsers.
- The PDFs are blank sheets at full size, with the frame and field labels, for printing or for students drawing by hand.
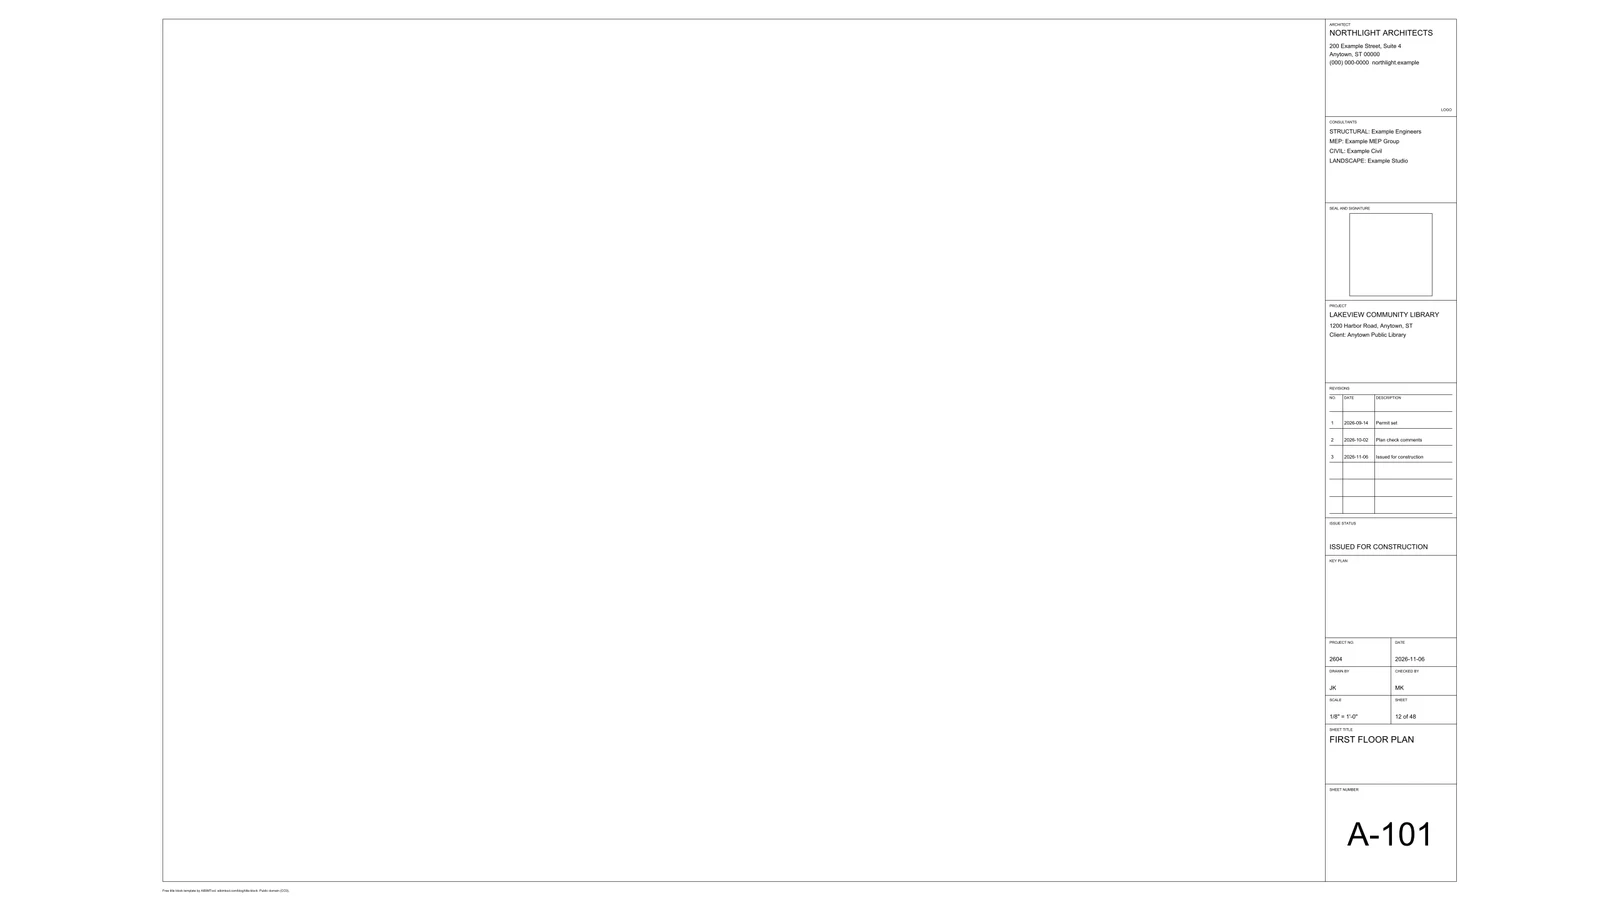
The ARCH D template filled with example values. The firm, project and people are made up; in the DXF every one of these is an empty attribute.
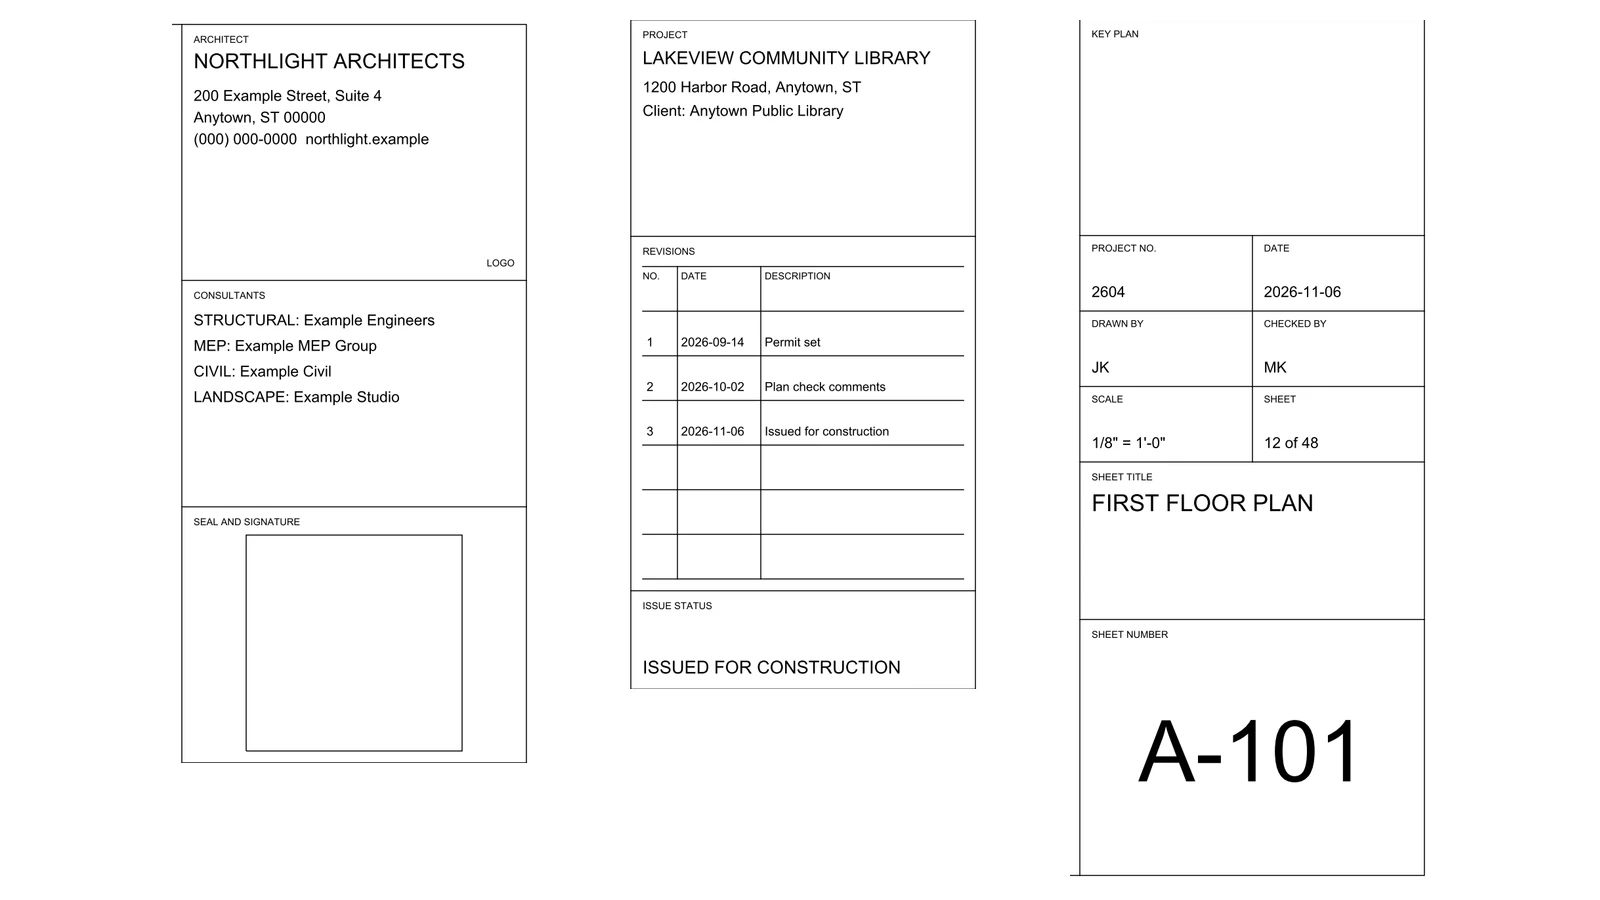
The same strip, cut into three parts to be readable on screen. Read it left to right: it runs top to bottom on the sheet.
How to add a title block to a layout in AutoCAD
In AutoCAD, the title block belongs on a layout (paper space), not in model space with your building. The building is drawn full size in model space, and a viewport on the layout shows it at the drawing scale inside the title block's frame.
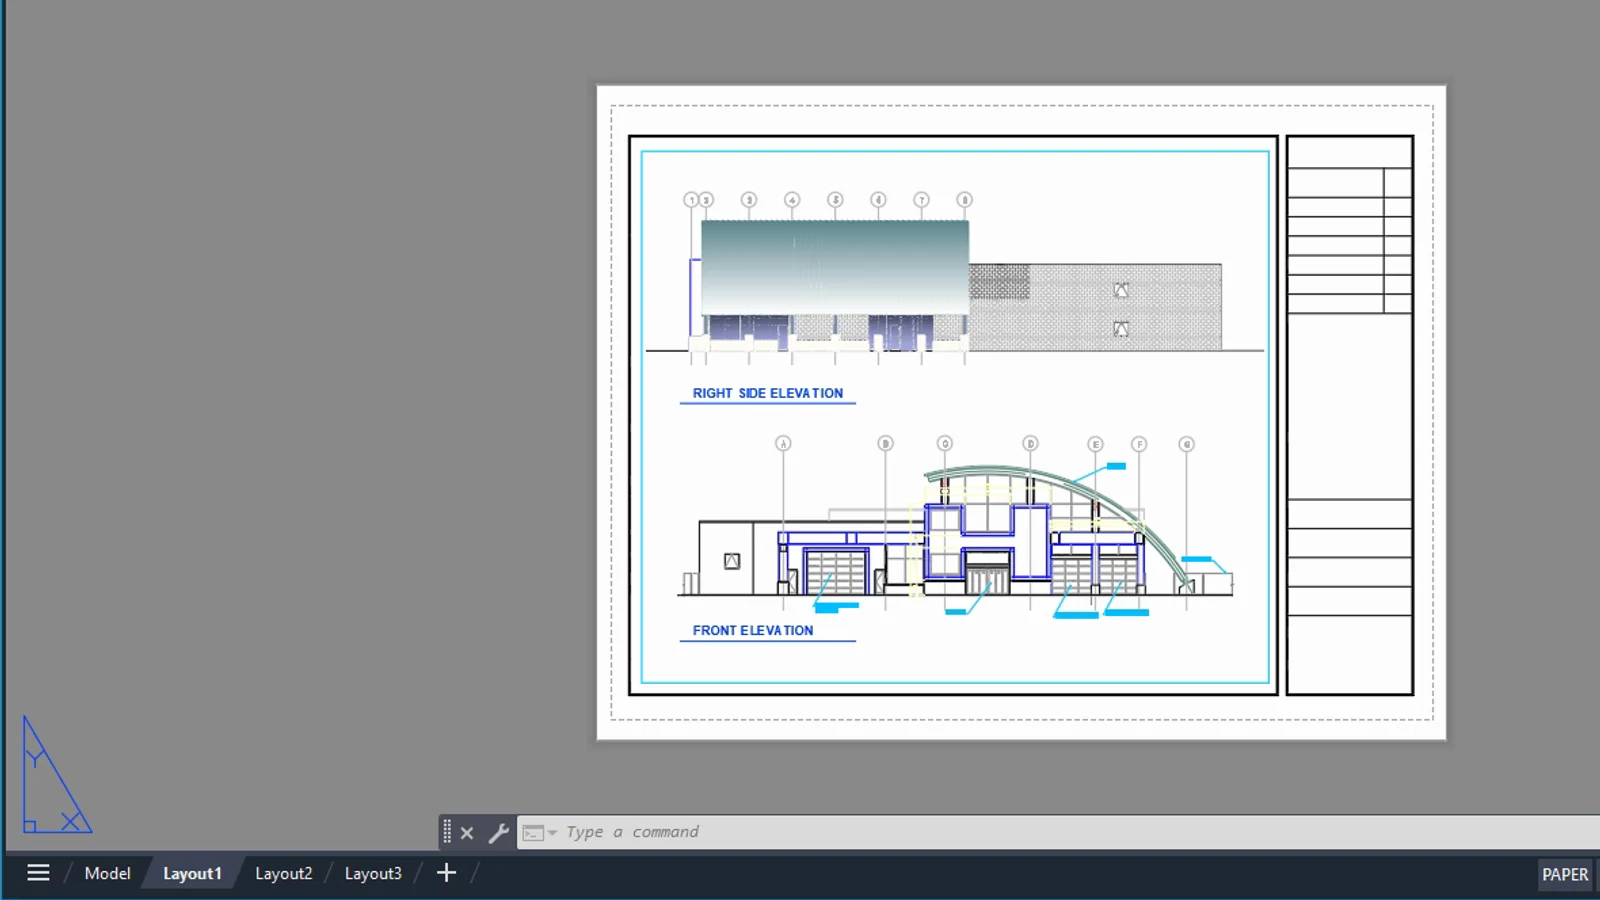
The setup in AutoCAD: on the Layout1 tab (paper space), a viewport shows the model's elevations at scale, and the title block strip runs down the right edge of the sheet. Frame from Autodesk's Tour the AutoCAD UI video, AutoCAD 2024, © Autodesk.
- Set up the sheet. Click a layout tab, right-click it and open the Page Setup Manager. Choose a plotter (DWG To PDF works), the paper size, for example ARCH full bleed D (36.00 × 24.00 inches), plot area Layout and plot scale 1:1.
- Make the title block a drawing you can insert. If you use our DXF, open it once and save it as a DWG with SAVEAS.
- Insert it. Run INSERT, browse to the title block drawing, and insert it at 0,0, scale 1, rotation 0. AutoCAD prompts for each attribute, such as the sheet number and the sheet title; with ATTDIA set to 1 it shows them all in one dialog. When a drawing with attribute definitions is inserted as a block, those definitions become attributes you can edit.
- Fill in or change values later by double-clicking the title block, which opens the Enhanced Attribute Editor.
- Add a viewport. Delete the default viewport if it covers the strip, then use MVIEW to draw a viewport inside the frame, left of the title block. Select it and pick the scale, for example 1/8" = 1'-0", from the viewport scale list. Lock the viewport so the scale cannot change by accident.
For a set of many sheets, put the title block in a drawing template (DWT) or use the Sheet Set Manager, so the project name and similar values are typed once and shared by every sheet through fields.
How to make a title block in Revit
In Revit a title block is a family, built in the Family Editor and loaded into the project:
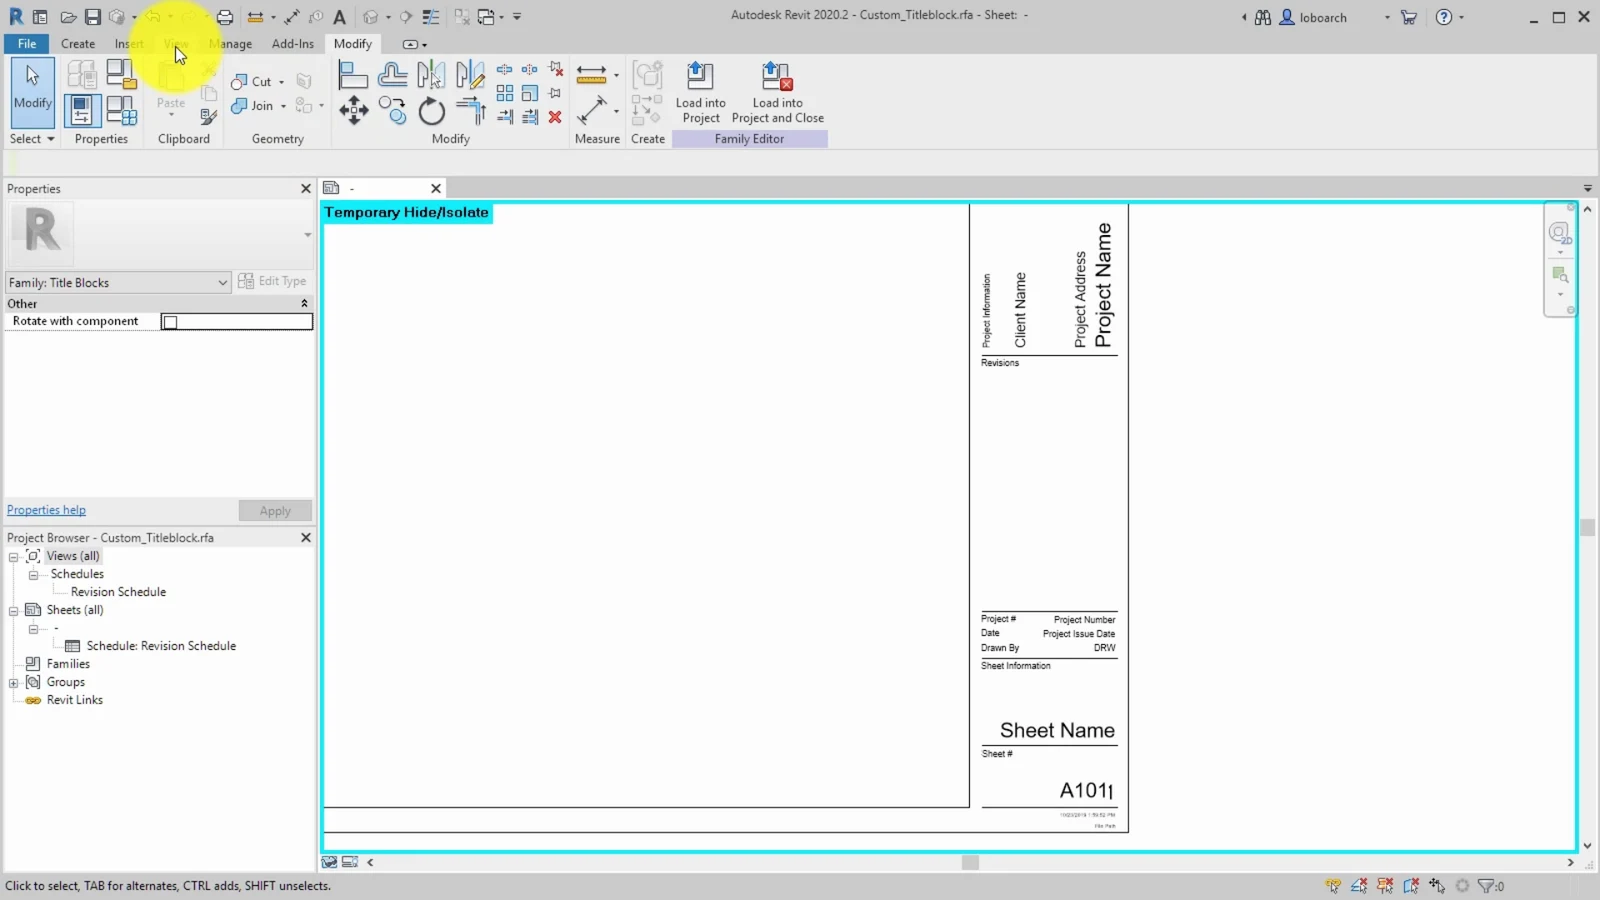
A title block family in Revit's Family Editor. Each label (Project Name, Client Name, Sheet Name, A101) reads a parameter, so it fills itself in on every sheet. Frame from Autodesk's Create a Custom Titleblock video, Revit 2020.2, © Autodesk, CC BY-NC-ND 3.0.
- Start a title block family from one of Revit's title block templates, which set the sheet size (for example 36 × 24).
- Draw the frame and divisions with lines, and import your logo as an image from the Insert tab.
- Place labels, not text, for anything that changes. A label reads a parameter: Sheet Number, Sheet Name, Drawn By, Checked By, Approved By and Sheet Issue Date come from each sheet, and Project Name, Project Number, Client Name and Project Address come from Project Information, so they are typed once for the whole project.
- Add a revision schedule to the family, so the revisions you issue in the project fill the revision table automatically.
- Load the family into the project and pick it when you create a sheet.
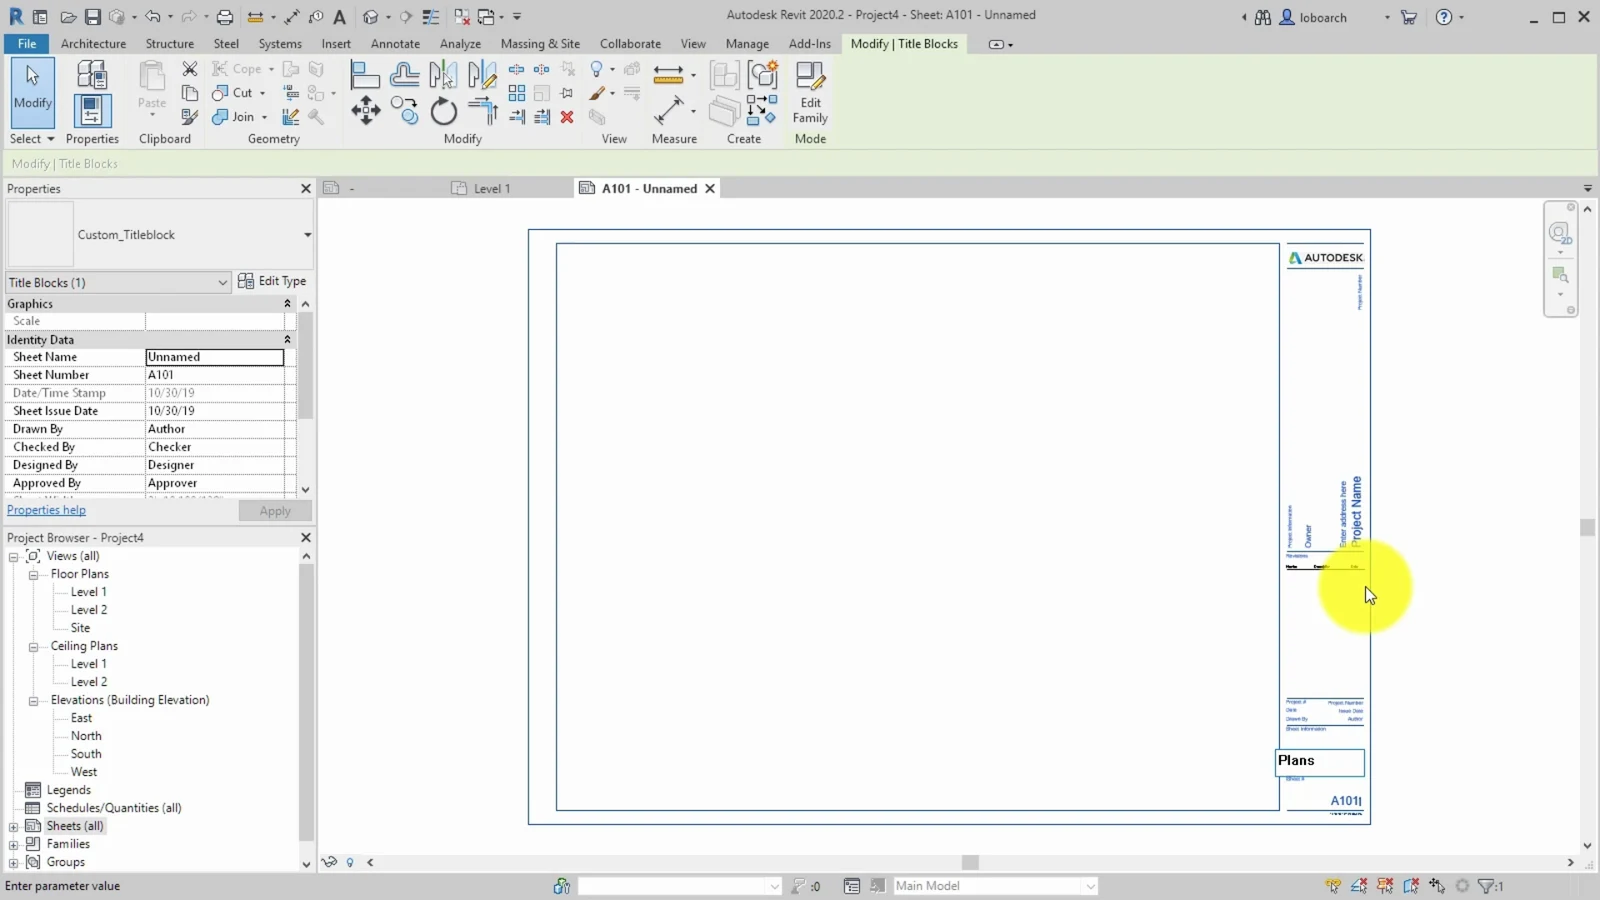
The family on a sheet: Sheet Number, Drawn By, Checked By and the other per-sheet values sit in the Properties palette and appear in the title block. Typing in the title block edits the same parameter. Frame from the same Autodesk video, © Autodesk, CC BY-NC-ND 3.0.
For a field Revit does not have, such as an issue status, create a shared parameter and use it in a label: shared parameters, not project parameters, are visible to both the family and the project. A Revit title block cannot be made from a DXF; you can import the DXF into the family as a guide and trace it, but the labels must be Revit labels.
In Archicad the same job is done by a master layout, where Autotext fields read the project info, the layout name and the layout ID.
Common title block mistakes
- Typing values that should be linked. A sheet number typed as text instead of a field or label goes wrong the first time sheets are renumbered.
- Forgetting the revision when reissuing. If the revision row is not added, the old and new prints look identical and the wrong one gets built.
- A scale that does not match the views. If the views on a sheet use different scales, write AS NOTED in the title block and give each view its own scale under its title.
- Too much in the block. General notes, legends and code summaries belong in the drawing area or on G-series sheets. ISO 7200's advice holds everywhere: keep the block to the fields that identify the drawing.
- Text too small to print. Text that reads well on screen can vanish on a half-size print. Keep plotted text at 3/32 inch (about 2.5 mm) or larger, which is why our ARCH B template is meant as a half-size print of the D sheet, not as a standalone sheet.
Where AIBIMTool fits
AIBIMTool does not draw title blocks or sheets: that is what CAD and Revit are for, and the templates above are our contribution to that step. What it does is the step before: it turns a written brief and a real site into an editable IFC4 BIM model with storeys, walls, slabs, doors, stairs and named rooms, plus a 2D plan of every storey. You open the model in Revit, Archicad or any IFC tool and produce the sheets there, with a title block like these.
Start the model before the sheets
- Brief and site in, BIM out. Describe the building and load the site; AIBIMTool models it as IFC4.
- Plans per storey, cut 1.2 m above the floor with rooms, areas and doors.
- Finish the drawings in your CAD, with the free title blocks from this article.
Sources
- ISO 7200:2004, Technical product documentation, Data fields in title blocks and document headers: the mandatory and optional fields, field lengths and the 180 mm width (read in the iTeh preview).
- ISO 5457:1999/Amd 1:2010, Sizes and layout of drawing sheets: the title block position on A0 to A4 sheets.
- Paper size, Wikipedia: ARCH, ANSI and ISO sheet dimensions.
- Autodesk, Create a title block (AutoCAD Electrical help) and Attribute Definition dialog box (AutoCAD LT help): attribute definitions becoming attributes when a drawing is inserted.
- Autodesk, Create a custom titleblock (Revit help) and Add custom fields to a title block: title block families, labels and shared parameters.
- Autodesk help videos: Tour the AutoCAD UI (AutoCAD 2024) and Create a Custom Titleblock (Revit 2020.2).
- ezdxf: the open-source Python library our DXF templates were generated with.
Frequently asked questions
What is a title block?
A title block is the labelled box or strip on every drawing sheet that identifies the drawing: who made it, which project and sheet it is, its title, scale, date and revision, and who checked and approved it. It usually sits in the bottom right corner (ISO sheets) or in a vertical strip down the right edge (most US architectural sheets), so anyone flipping through a set finds the same information in the same place.
What goes in a title block?
At minimum: the firm or owner, the project name and address, the sheet title, the sheet number, the scale, the date of issue, the revision number, and who drew, checked and approved the sheet. Architectural title blocks usually add the client, consultants, a revision table, the issue status (for example issued for construction), the architect's seal and signature, a key plan and the project number. ISO 7200 makes eight fields mandatory: legal owner, identification number, date of issue, sheet number, title, approval person, creator and document type.
Where is the title block located on a drawing?
On ISO A0 to A3 sheets the title block sits in the bottom right corner of the drawing area, as ISO 5457 requires, so it is visible when the sheet is folded to A4. Most US architectural sets use a vertical strip down the right edge of the sheet, with the sheet number at the bottom right. Either way the sheet number ends up in the bottom right corner, where people look first.
What is not included in a title block?
Drawing content and notes that belong to one view are not part of the title block: dimensions, general notes, legends, schedules and view titles go in the drawing area. ISO 7200 also keeps the title block to a minimum and puts data such as the scale, the projection symbol and general tolerances outside it when they are used. Many architectural title blocks still carry the scale, or AS NOTED when views on one sheet have different scales.
How do I add a title block to a layout in AutoCAD?
Open the layout tab, set the paper size in the Page Setup Manager (for example ARCH D, 36 x 24 inches) at a plot scale of 1:1, then INSERT the title block drawing at 0,0 with scale 1 and rotation 0. AutoCAD asks for each attribute value, such as the sheet number; you can change them later by double-clicking the block. Finally create a viewport inside the frame with MVIEW and set its scale.
How do I make a title block in Revit?
In Revit a title block is a family. Start a new title block family from a sheet-size template, draw the lines, and place labels tied to parameters such as Sheet Number, Sheet Name, Project Name, Drawn By and Checked By, then load the family into the project. Each new sheet uses it, project-wide values come from Project Information, and per-sheet values come from the sheet's properties. Fields Revit does not have need shared parameters.
Are there free title block templates?
Yes. This article offers five free title block templates as DXF and PDF, released into the public domain (CC0): ARCH D (36 x 24 in), ARCH E1 (42 x 30 in) and ARCH B (18 x 12 in) with a US vertical strip, and ISO A1 and A3 with an ISO 7200 title block. The DXF files open in AutoCAD, BricsCAD, DraftSight and other CAD programs, and every field is an attribute you fill in when you insert the file.
What size is a title block?
ISO 7200 sets the width of the title block at 180 mm for every sheet size, so the same block fits an A4 sheet with its 20 mm left and 10 mm right margin. US vertical strips have no standard width; on a 36 x 24 inch ARCH D sheet they are typically 3 to 4 inches wide and run the full height of the border, and the strip in our ARCH D template is 3.5 inches.







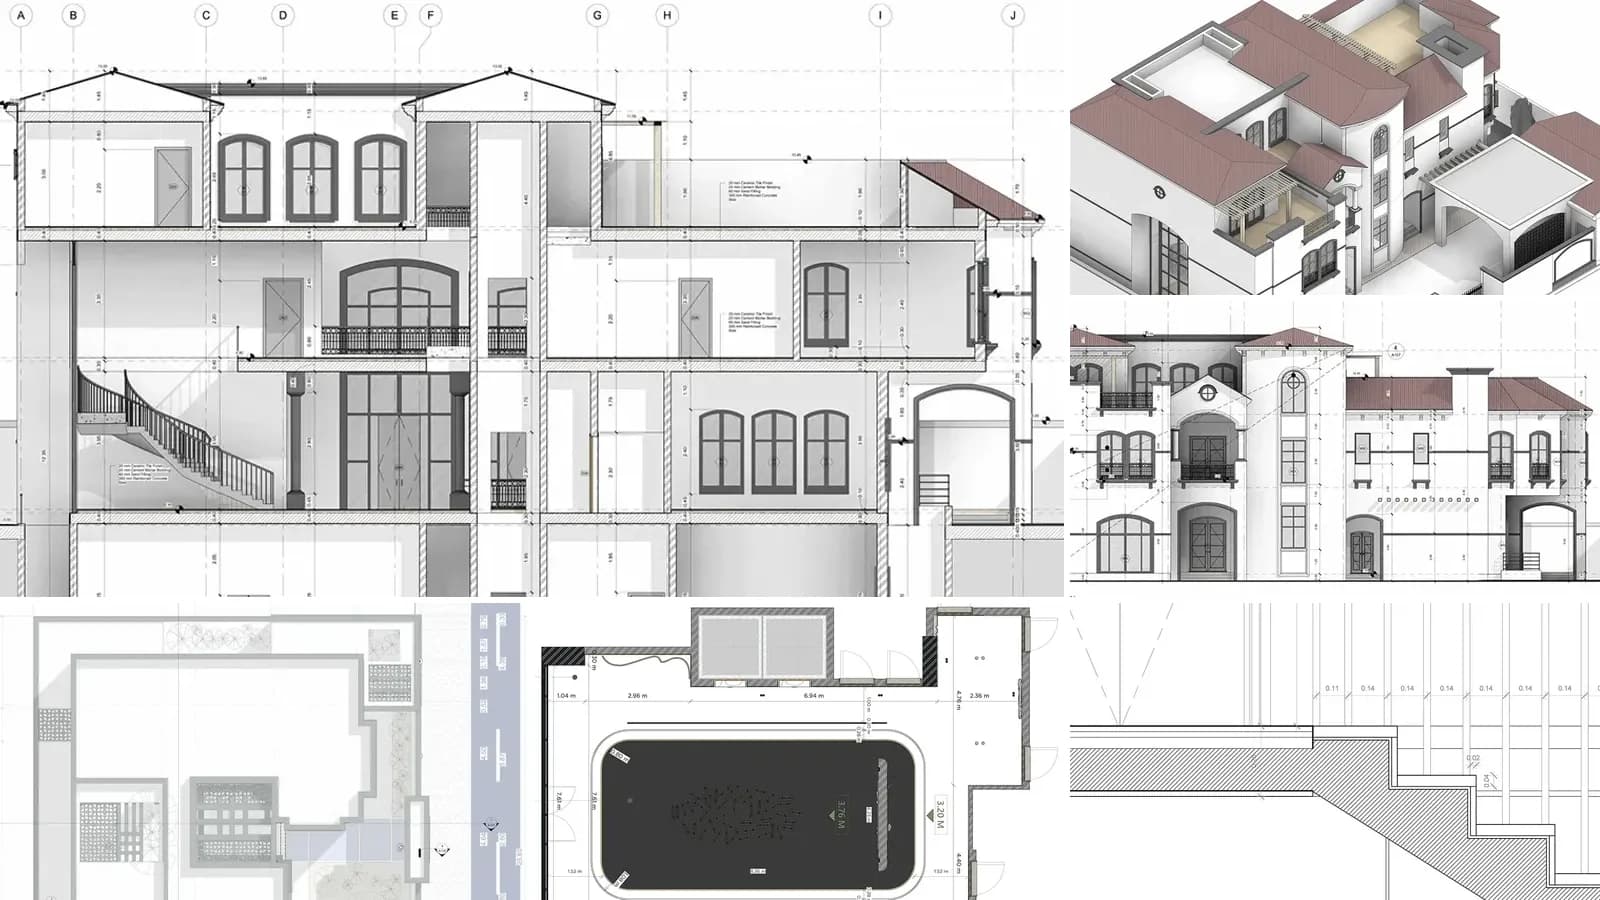
Architectural Drawings: 12 Types, Scales and How to Read Them
What architectural drawings are, the 12 types in a full drawing set with real examples, US scales, sheet numbers like A-101, the drawings each project phase produces and how to read them.
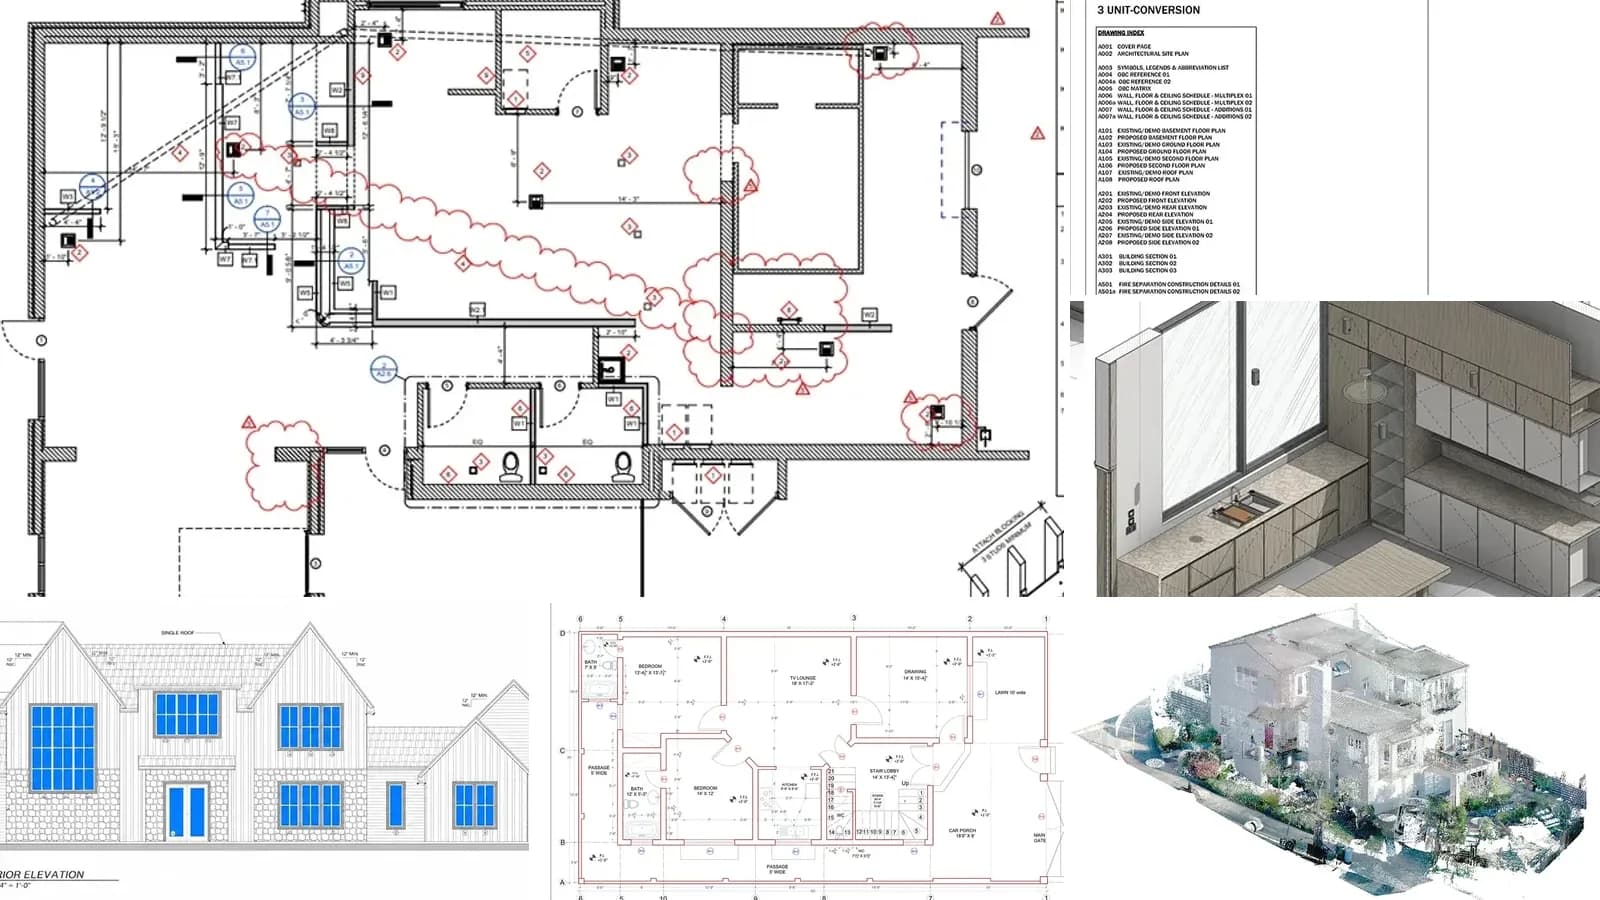
IFC Drawings: What Issued for Construction Means, and IFC vs IFA, IFB and Shop Drawings
IFC drawings are the sheets issued for construction: the revision a contractor is allowed to build from. What an IFC set contains, the IFR, IFA, IFB, IFC ladder, how IFC differs from shop and as-built drawings, how revisions work after issue, and the UK ISO 19650 codes that replace it.
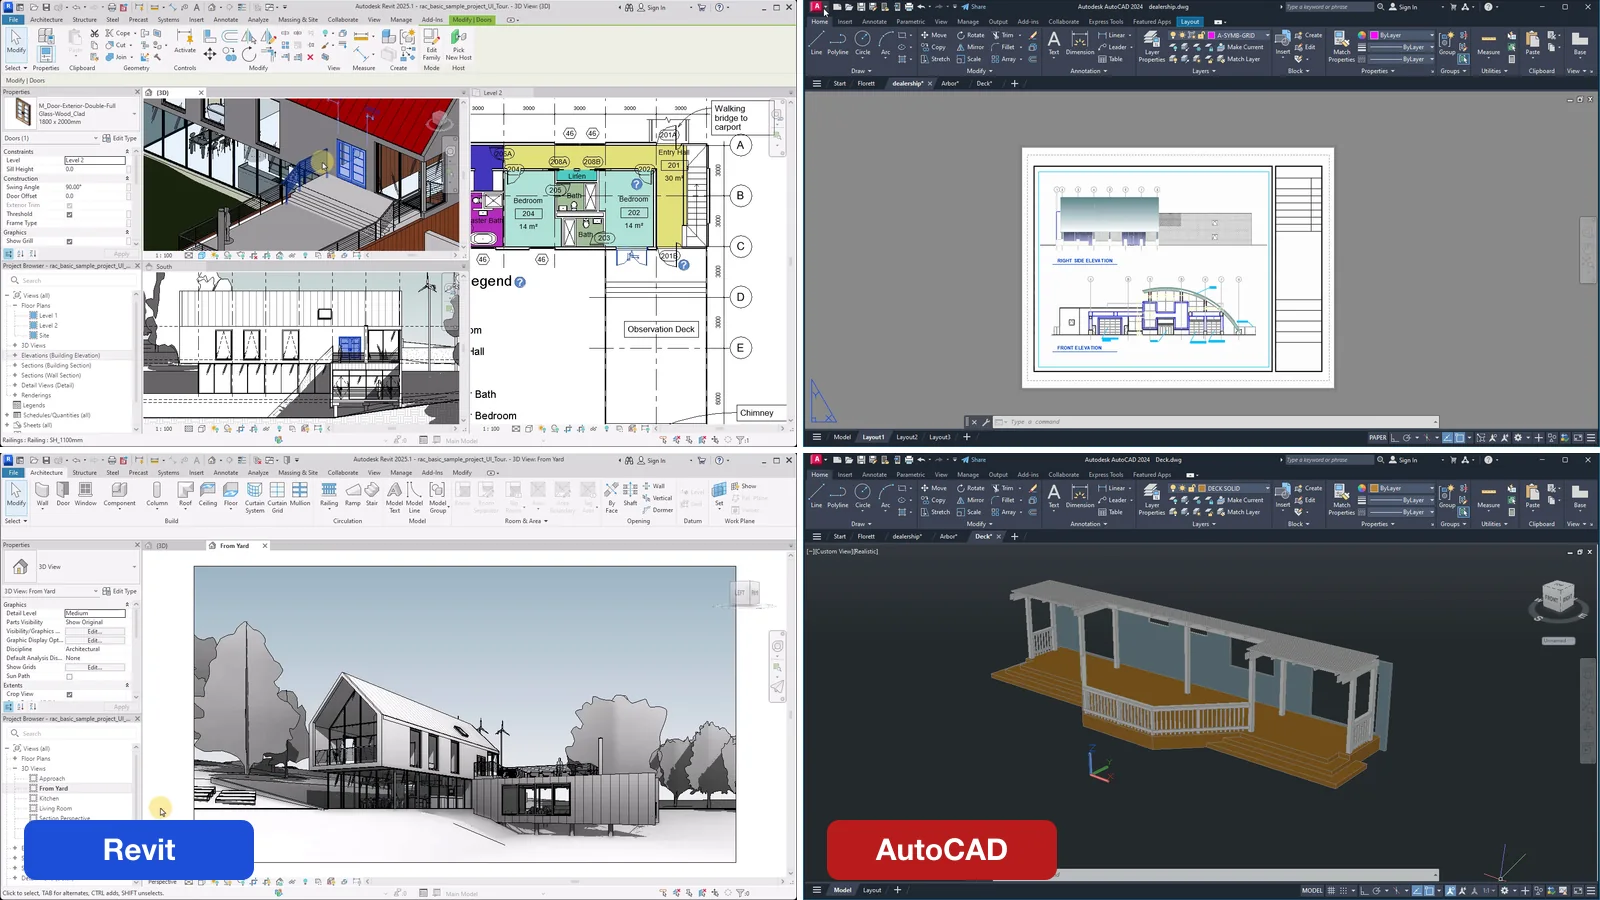
Revit vs AutoCAD in 2026: The Real Difference, the Price, and Which One to Use
AutoCAD draws lines; Revit models a building. We compare them on what they actually do, with real screenshots of both, 2026 prices from Autodesk's own stores ($2,095 vs $3,005 a year), where each one is the wrong tool, how they work together, and which one to learn or buy.